Adding functionality and media using widgets can raise your page’s quality and help you align your page with your brand’s goals. Luckily, many CMS’s have built-in widget tools that make this process quick and easy. If you want to add widgets to your HTML page, it is often one Google search away since there are so many resources with JavaScripts out there (although it will also require tweaking and testing as well).
In this post, I will show you the process of adding a YouTube video, a Twitter feed, social buttons, a contact form, and an image gallery to my WordPress page. As a bonus, I will show you the process I used to add it to my HTML page. Let’s get started!
WordPress “Blocks”
On WordPress, widgets are called “blocks”. Adding many widgets is as simple as clicking the “add block” button and searching for the block you want.

To embed a YouTube video all you have to do is paste a link.
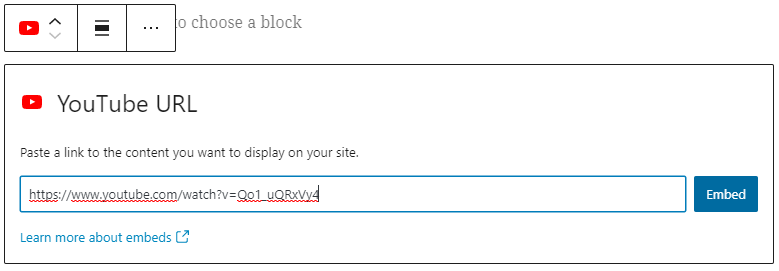
And it will end up looking like this:
Embedding a Twitter feed is just as straightforward.
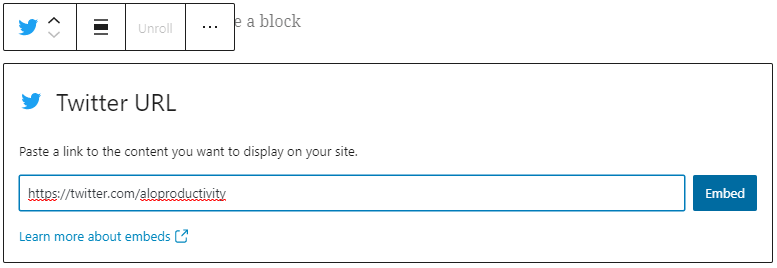
And it will end up looking like this:
A contact form is even more simple – you just have to select that block and customize the options if you wish. The default is below:


The process of adding social media buttons is a bit different. For my blog I decided to include it on the header of each page. To do the same, you need to go to the customize tab in your WordPress dashboard.
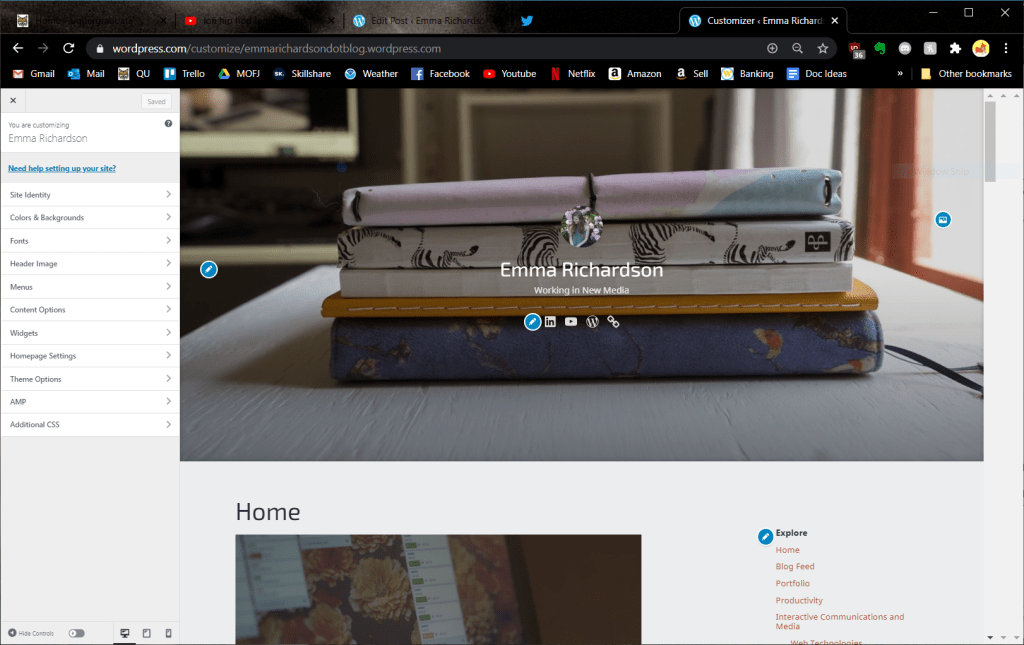
Next, go to menus then create new menu. There will be an option for a “social menu” built in. Then you simply click “add item” for each link you want to place.

WordPress will detect most of the links’ logos and make the button the same – if not, it will just appear as a link icon.

There are many more widgets to explore on WordPress – now that you know the basics you should try some out on your own!
Embedding with HTML
There is some good news and some bad news when it comes to embedding with HTML. The bad news is, like everything with hand-coding, you have to understand the basics of HTML and you need to input the code yourself. The good news is that many websites have built-in embedding tools so it may be as simple as copying and pasting code then doing simple adjustments to customize it.
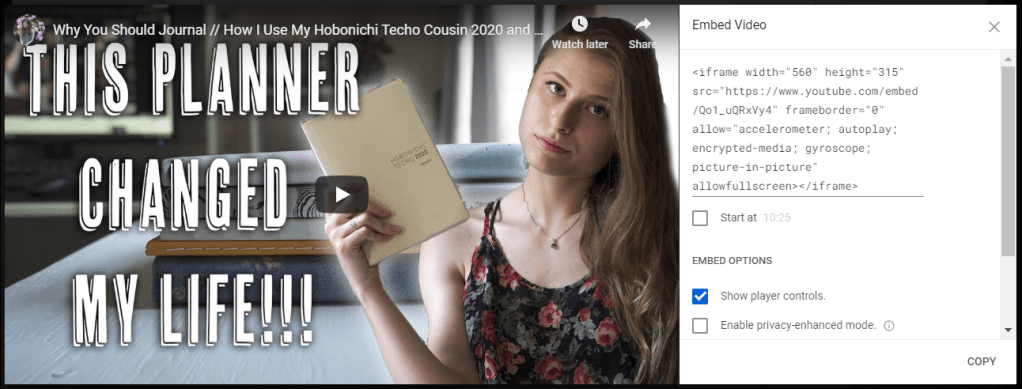
To embed a video, you use the “iframe” tag. A simple template is here:
<iframe width="560" height="315" src="VIDEO LINK HERE"> iframe>However, on YouTube all you have to do to grab this code is go to “share” and select “embed”. Then you just copy the code and paste it onto your website.
To embed a Twitter feed, you need to use the Twitter Publish tool. This creates the code you need to embed a profile, hashtag, single tweet, timeline, and more.

You can then customize the theme, size, and language and it will give you the code to copy and paste.

Adding a contact form to HTML is a little more tricky. Luckily, as I said earlier, there are many resources that have the code already typed out for you. W3Schools has a contact form that uses HTML and CSS here. Note that the HTML code goes where you want it to appear on your page but any CSS goes in the style tag in your header. This form will not function without PHP, however, which I will explain in future posts.
For an image gallery, there are countless pre-made scripts out there. For my own website I used this one from W3Schools. After you copy and paste it be sure to rename the image files to match the name in the folder. Like with all CSS, it must go in the style tag in the header.

One last function I will add are the social media buttons. Again, I used W3School’s pre-written code and style sheet.
There are a few things you need to do to make the buttons look nice and functional.
First of all, decide which buttons you want to add by copying this code and replacing the “social_meadia_name” with the name in all lowercase.
<a href="#" class="fa fa-social_media_name"></a>Next, scroll up the the style section and replace the name there as well.
/* Social Media Name */
.fa-social_media_name {
  background: #C13584;
  color: white;
}
Change the background color to match either your website’s color palette or to the brand’s color. You can find the HEX codes for the social media sites here.
After adding all the buttons you want and styling them, it is time to make them actually work. Just replace the # after the “a href=” to the url.
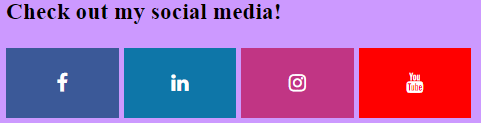
<a href="#" class="fa fa-social_media_name"></a>Here is what my buttons look like after styling and activating them all:
You can see all of these functions on my page here.
Now that you know the basics of adding widgets to both CMS’s and HTML pages it is time to explore and try out different widgets that match your brand. Follow my blog for more posts on web technology as I continue to learn about improving my web spaces.

2 responses to “Adding Functionality and Media to Your CMS and HTML Pages”
[…] text – bots will be able to better understand what the image is trying to convey. Check out more of my posts on adding functionality to your page to make a better UX […]
LikeLike
Nice, Css Minifiers is best tool for Unminify JS (Javascript), XML, JSON, SQL, CSS, HTML tool is used to clear, reformat, deminify, uncompress, and beautify ugly codes online, make it unminified and readable. Check out: http://cssminifiers.com/
LikeLike